Recently, I started experimenting with ROS2, which requires Ubuntu 22.04. In the newest version of Parallels Desktop, the default Ubuntu installation provided is version 24.04. For ARM machines, you can only download Ubuntu 22.04 as a server version (i.e., without a nice GUI). And the most annoying part is the disk memory management in Parallels Desktop. I installed and uninstalled the VM several times because of that. Therefore, I documented the process of setting up an Ubuntu 22.04 VM desktop, mainly in case I need to reinstall it in the future (hopefully not… 🙃)
Disclaimer: I’m not a Linux expert, so I can only guarantee the following steps work for people who want to install an Ubuntu 22.04 Desktop VM on their ARM64 Mac with Parallels Desktop.
Download and Install Ubuntu Server
- Go to the 22.04 release page and download the ISO image.
- Create a new VM with the
.isoimage downloaded in step 1. - Set up the language, username, and choose the packages you need (like docker).
- Log in to the ugly commond line system (press enter if you can’t, in most cases it solves the problem), then install the Ubuntu desktop and reboot:
sudo apt update
sudo apt upgrade -y
sudo apt install ubuntu-desktop -y
sudo systemctl set-default graphical.target
sudo rebootInstall Parallels Tools in Ubuntu
Since we didn’t use the default Parallels installation, we need to manually install Parallels Tools to enable copy & paste sharing between Ubuntu and Mac. This requires a purchased license for Parallels Desktop and the tool installed.
- Go to CD/DVD section in configurations of the VM
- Click
choose an image file, in the Finder, go toApplication/Parallels Desktop/Resources/Tools, choose theprl-tools-lin-arm.iso(or other image that suit your laptop architecture). - Now in Ubuntu, you will also see the
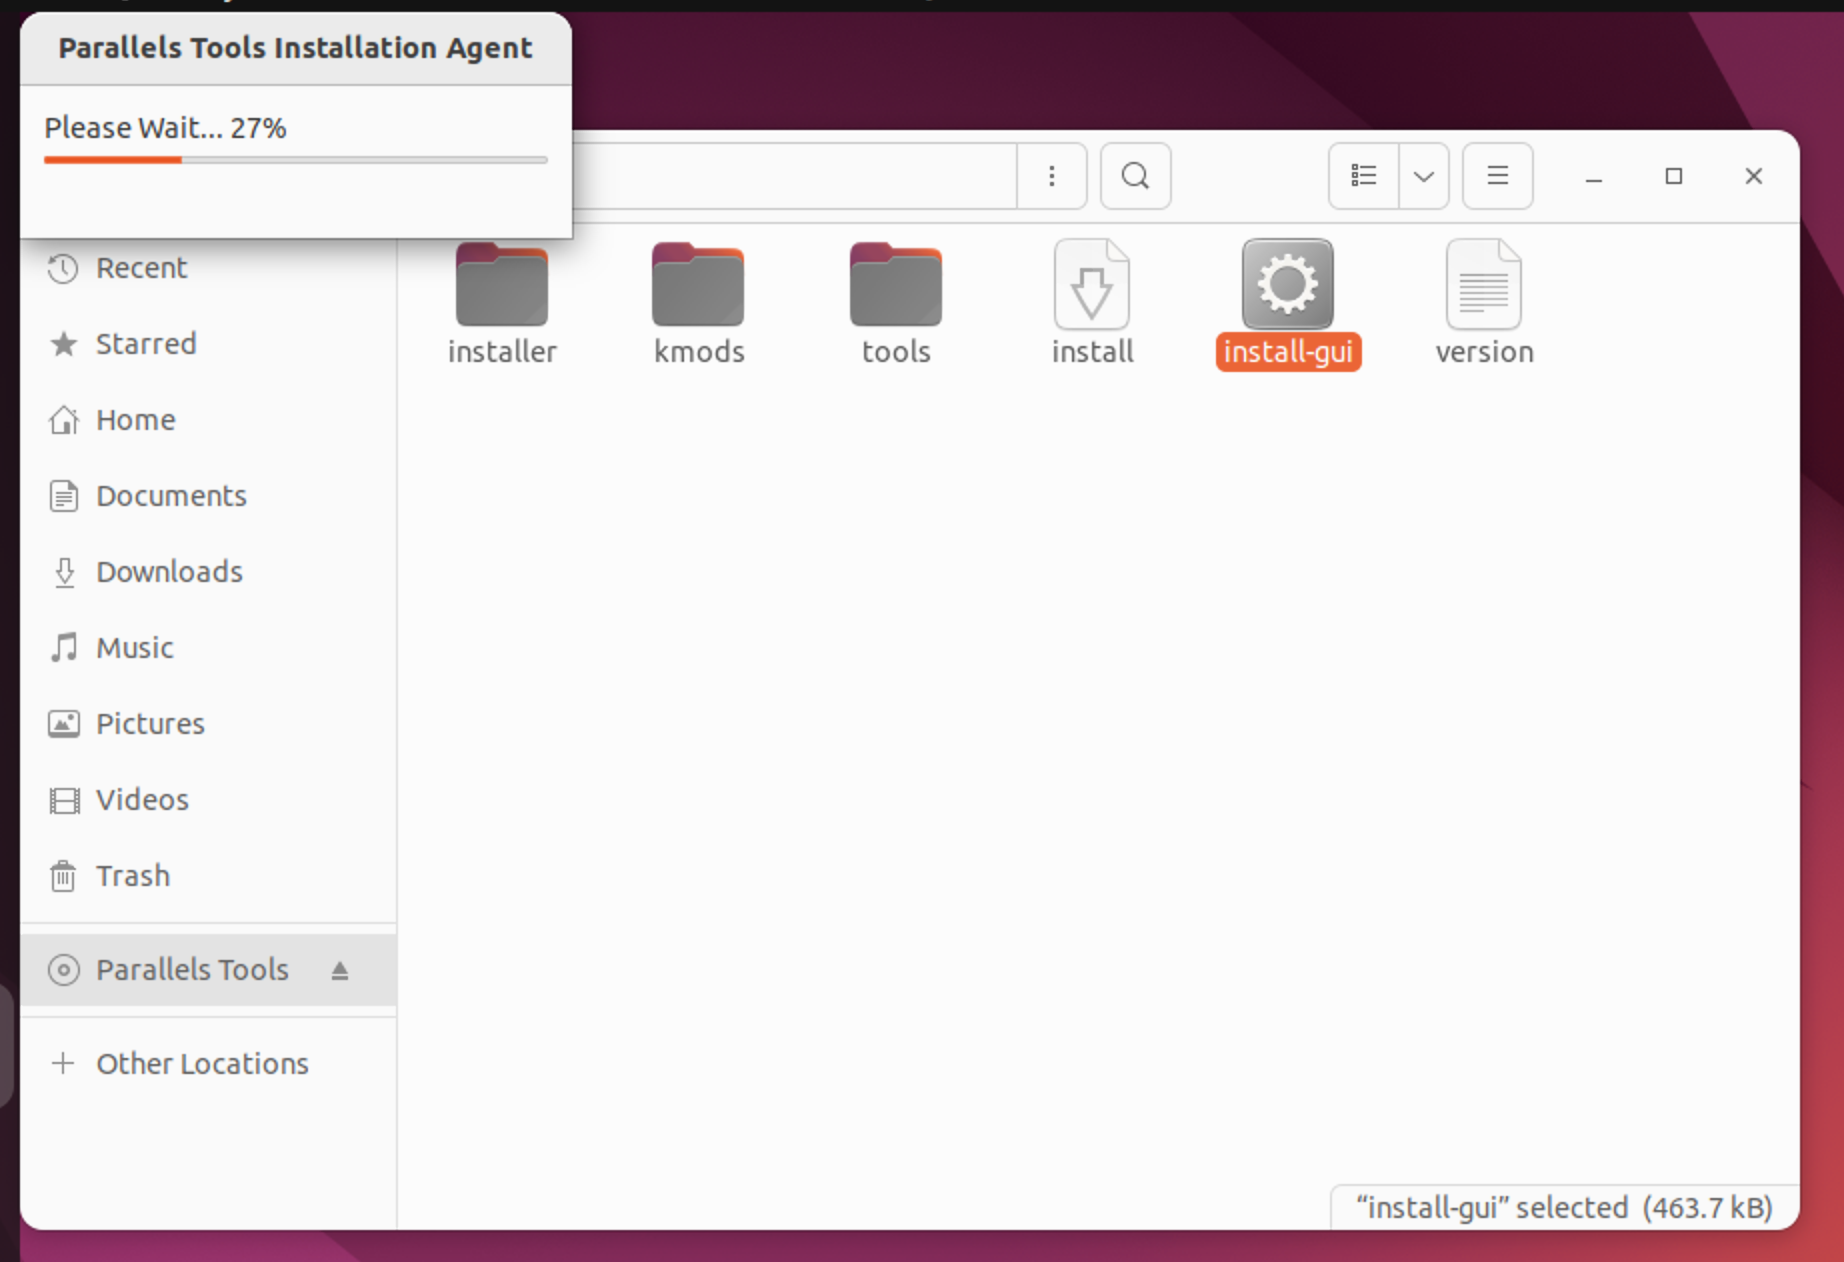
Parallels Toolsmounted, clickinstall-guiand wait to reboot. - Now you can share the copy & paste between Mac and Ubuntu.

Increase Disk Space for Ubuntu
By default, Parallels allocates 64GB of disk space to the root filesystem, which is not enough for most use cases. There is an official tutorial on increasing disk space, but it didn’t work for me. After asking differetn LLMs, here’s what worked:
- Shut down the VM and allocate more disk space in the Parallels configuration.
- Start the VM and, in the terminal, type:
sudo apt update
sudo apt install cloud-guest-utils
lsblkHere, you will see the disk partitions, then
- Enter
sudo fdisk /dev/sdato open fdisk. Then:- Enter
nto create a new partition (accept defaults to use free space). - Enter
tto change the type of the new partition (e.g.,/dev/sda5). - Enter the partition number (e.g., 5).
- Enter
30to set the type as LVM. - Enter
wto write changes and exit.
- Enter
- Now allocate space from the new partition to the root filesystem:
sudo partprobe
sudo pvcreate /dev/sda5 # (Assuming the new partition is sda5)
sudo vgextend ubuntu-vg /dev/sda5
sudo lvextend -l +100%FREE /dev/ubuntu-vg/ubuntu-lv
sudo resize2fs /dev/ubuntu-vg/ubuntu-lv
df -h /Some Useful Packages/Tools for Ubuntu
VSCode
wget -qO- https://packages.microsoft.com/keys/microsoft.asc | gpg --dearmor > microsoft.gpg
sudo install -o root -g root -m 644 microsoft.gpg /etc/apt/trusted.gpg.d/
rm microsoft.gpg
sudo sh -c 'echo "deb [arch=arm64] https://packages.microsoft.com/repos/code stable main" > /etc/apt/sources.list.d/vscode.list'
sudo apt update
sudo apt install code -y
source ~/.bashrc
codeFirefox
sudo apt install firefox -y
sudo update-alternatives --install /usr/bin/x-www-browser x-www-browser /usr/bin/firefox 100GitHub CLI (gh)
sudo apt install gh
ssh-keygen -t ed25519 -C "your email"
cat ~/.ssh/id_ed25519.pub
# Go to https://github.com/settings/keys, add your SSH key, and authorize if needed.
gh auth logingit-lfs
sudo apt update
sudo apt install git-lfs
git lfs installAWS CLI and aws-sso
If you want to use AWS SSO, do not use sudo apt install awscli (it installs v1, which won’t work for aws-sso).
- Go to the AWS CLI relsease page and replace the curl link below:
curl "https://awscli.amazonaws.com/awscli-exe-linux-aarch64.zip" -o "awscliv2.zip"
unzip awscliv2.zip
sudo ./aws/install
ls -l /usr/local/bin/aws- Download the latest aws-sso binary release from the release page, move it to your $PATH (usually
/usr/local/bin/), and rename it toaws-sso:
cd ~/Downloads
wget https://github.com/synfinatic/aws-sso-cli/releases/download/v2.0.1/aws-sso-2.0.1-linux-arm64
sudo mv ~/Downloads/aws-sso-2.0.1-linux-arm64 /usr/local/bin/aws-sso
cd /usr/local/bin/
sudo chmod +x aws-ssoNow you can configure AWS with
aws configure ssoIf you want to configure aws-sso and use
aws-sso exec -plater:
mkdir ~/.aws-sso
aws-sso # configure again
nano ~/.aws-sso/config.yaml # change the ProfileFormat as you wantROS2
Follow every step in the official tutorial.